How To Make Cannabutter: The Foundation of Every Great Edible
If you have ever browsed the shelves of a dispensary, you’ve likely seen the dazzling array of Edibles available—from gummies and chocolates to mints and pastries. But long before commercial kitchens were producing standardized treats, there was one humble ingredient that started it all: Cannabutter.

Cannabis-infused butter, or “cannabutter,” is the culinary backbone of the homemade edible world. It is the versatile “master key” that unlocks the potential to turn any recipe requiring fat—be it brownies, cookies, mashed potatoes, or even a morning slice of toast—into a psychoactive experience.
Learning how to make cannabutter at home is a rite of passage for any cannabis enthusiast. It allows you to control the strain, the potency, and the ingredients, saving you money while letting you customize your high. In this guide, we will break down the science of activation, the importance of dosing, and the step-by-step methods to create liquid gold in your own kitchen.
The Science: Why You Can’t Just “Throw It In”
A common mistake beginners make is simply sprinkling ground cannabis into a brownie mix and hoping for the best. This results in a gritty texture and, more importantly, very weak effects. To make effective edibles, you must understand two chemical processes: Decarboxylation and Lipid Infusion.
1. Decarboxylation (The Activation)
Raw cannabis flower does not actually contain THC (the compound that gets you high). It contains THCa (Tetrahydrocannabinolic acid), which is non-psychoactive. If you eat a raw bud, you won’t feel a thing.
To convert THCa into THC, you need heat. When you smoke, the flame does this instantly. When cooking, you must do it manually before infusion. This process is called decarboxylation (“decarbing”).
-
The Sweet Spot: Baking your dry weed at a low temperature (approx. 230°F–245°F) for 30–40 minutes. This removes the carboxyl group from the molecule, activating the psychoactive potential without destroying the terpenes.
2. Lipid Infusion (The Extraction)
THC is lipophilic, meaning it loves fat. It is not water-soluble. To get the THC out of the plant and into your body, you need a carrier fat. Butter is ideal because of its high saturated fat content, which binds readily to cannabinoids.
-
Note: While regular butter works well, many pros prefer Clarified Butter (Ghee). Ghee has had the milk solids removed, giving it a higher smoke point and a longer shelf life.
The Golden Ratio: How Much Weed Do I Use?
Potency is subjective. However, a standard “baseline” ratio for home cooks is: 1 Cup of Butter (2 sticks) : 7–10 Grams of Cannabis
-
7 Grams (1/4 oz): Mild to Medium potency. Good for casual users.
-
14 Grams (1/2 oz): High potency. For experienced users with high tolerance.
-
28 Grams (1 oz): Very Strong. Proceed with caution.
The Preparation: Decarboxylation Guide
Before you melt a single stick of butter, you must decarb your weed. Do not skip this step!
Tools Needed:
-
Baking Sheet
-
Parchment Paper
-
Grinder (or scissors)
-
Oven
Instructions:
-
Preheat: Set your oven to 240°F (115°C).
-
Break It Up: Coarsely grind your cannabis. You don’t want a fine powder (which can burn), but small, pea-sized chunks.
-
Spread: Line your baking sheet with parchment paper and spread the cannabis evenly in a single layer.
-
Bake: Place in the oven for 30 to 40 minutes.
-
Rotate: Every 10 minutes, gently shake the tray to ensure even heating.
-
Cool: The cannabis will change color from bright green to a toasted brownish-green. It should smell nutty and earthy. Let it cool completely.
Method 1: The Stovetop Method (The Classic)
This is the most common way to make cannabutter. It uses water to regulate the temperature, ensuring the butter doesn’t scorch and ruin the THC.
Ingredients & Tools:
-
1 Cup Unsalted Butter (or Ghee)
-
1 Cup Water
-
7–10g Decarboxylated Cannabis
-
Saucepan
-
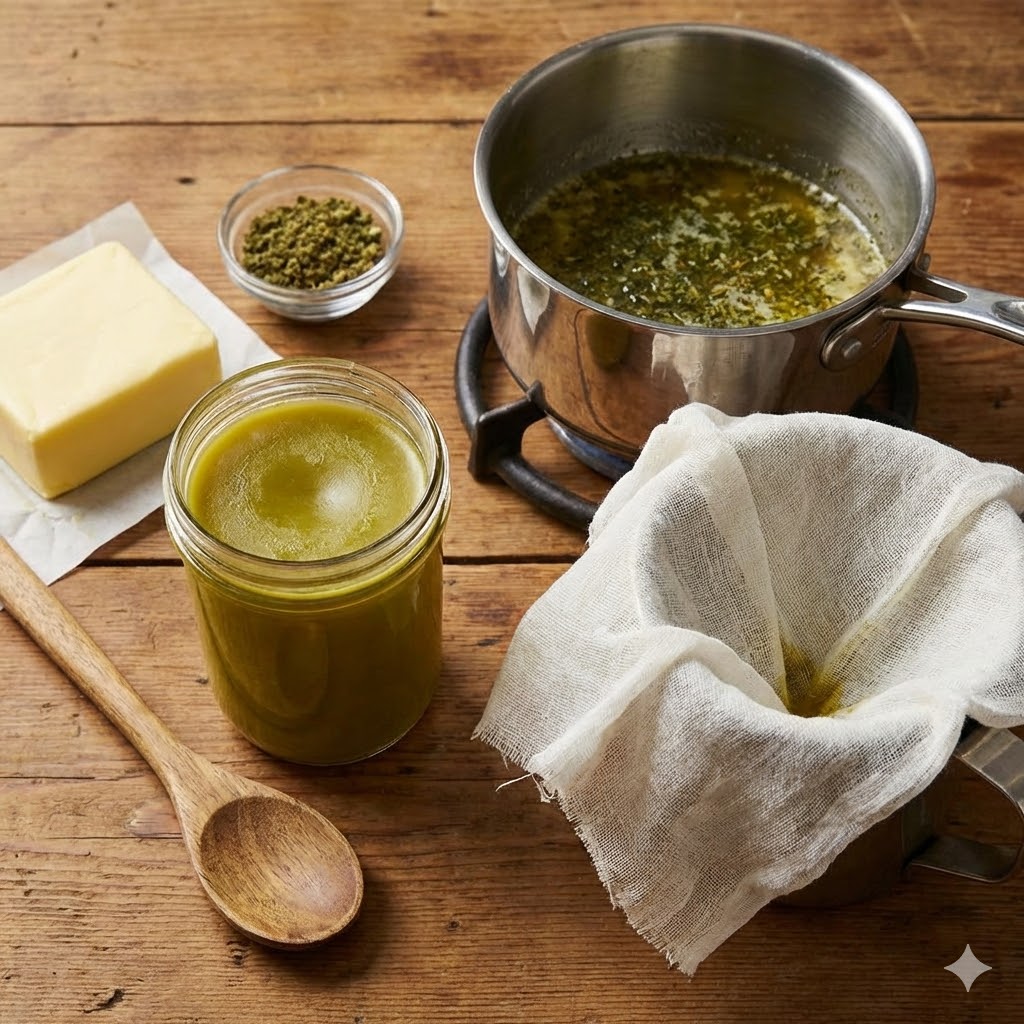
Cheesecloth and Funnel
-
Glass Jar for storage
Step-by-Step:
-
Simmer: In a medium saucepan, combine the water and butter. Turn the heat to low. The water is your safety net; as long as there is water in the pan, the temperature won’t exceed 212°F (100°C), protecting your cannabinoids from burning.
-
Add the Green: Once the butter is melted, stir in your decarboxylated cannabis.
-
The Low and Slow: Maintain a very low simmer. You should see small bubbles, not a rolling boil. If it boils too hard, turn it down.
-
Simmer Time: 2 to 3 hours.
-
Check: If the water evaporates, add a splash more warm water to keep the butter floating.
-
-
Strain: Set up a funnel over your glass jar and line it with cheesecloth. Carefully pour the mixture through the cloth.
-
Squeeze (Gently): Let it drain. You can gently squeeze the cloth to get the remaining butter out, but don’t squeeze too hard, or you’ll force bitter chlorophyll into your mix.
-
Chill and Separate: Put the jar in the fridge overnight. The butter will harden into a solid disk on top, while the water (containing all the nastiness) will settle at the bottom.
-
Harvest: Run a knife around the edge of the jar, lift out the solid butter disk, and discard the murky water. Pat the butter dry with a paper towel.
Method 2: The Slow Cooker Method (Set It & Forget It)
If you want to avoid standing over a stove, the crockpot is the way to go. It maintains a consistent temperature and minimizes the smell in your kitchen.
Ingredients & Tools:
-
1 Cup Butter
-
1 Cup Water
-
7–10g Decarboxylated Cannabis
-
Slow Cooker (Crockpot)
-
Cheesecloth/Strainer
Step-by-Step:
-
Combine: Turn your slow cooker to Low (approx. 160°F–180°F). Add the butter, water, and decarbed weed.
-
Cover: Put the lid on.
-
Wait: Let it infuse for 4 to 6 hours. Stir it occasionally (once every hour) to ensure even distribution.
-
Note: Some people infuse for up to 8 hours. Longer infusion extracts more plant material (chlorophyll), which can make the butter taste more “weedy,” but it ensures maximum potency.
-
-
Strain and Cool: Follow the same straining and separation process as the Stovetop method above (strain through cheesecloth, refrigerate, discard water).
Method 3: The Mason Jar Method (The Odor-Free Option)
This method creates a “sous-vide” effect inside a jar. It is excellent for small batches and keeps the “dank” smell contained completely.
Step-by-Step:
-
Place your butter and decarbed weed inside a Mason jar. Screw the lid on “finger tight” (don’t over-tighten, or pressure can build up).
-
Place a kitchen towel at the bottom of a pot and fill it halfway with water.
-
Place the jar in the water bath (the water should cover the butter line).
-
Simmer the water for 2 to 3 hours.
-
Remove the jar, let it cool slightly, strain, and refrigerate.
How To Dose Your Edibles Safely
Calculating the exact dosage of homemade edibles is tricky without a lab test, but you can estimate.
The Math:
-
Let’s say you used 10 grams of flower.
-
The flower is 20% THC (Check your strain info on our Hybrid Collection).
-
10 grams = 10,000mg.
-
20% of 10,000mg = 2,000mg of total THC.
-
However, infusion is never 100% efficient. Assume about 60% extraction rate for home cooking.
-
2,000mg x 0.60 = 1,200mg THC in your cup of butter.
If you make a batch of 24 brownies using that cup of butter: 1,200mg ÷ 24 brownies = 50mg per brownie.
Warning: 50mg is a very high dose for a beginner (standard dose is 5–10mg). Always start with a small portion (e.g., a quarter of a brownie) and wait 2 hours before eating more.

Storage and Usage
-
Fridge: Cannabutter will stay fresh in the fridge for 2–3 weeks.
-
Freezer: For long-term storage, wrap it in parchment paper and foil, then freeze. It will last for 6 months.
What Can I Make? You can substitute cannabutter 1:1 for regular butter in almost any recipe.
-
Baking: Brownies, cookies, and cakes are classics because the sugar and chocolate mask the earthy weed flavor.
-
Savory: Stir a teaspoon into pasta sauce, melt it over popcorn, or drizzle it on roasted vegetables.
-
Bulletproof Coffee: Blend a small teaspoon into your morning coffee for a wake-and-bake energy boost.
Conclusion
Making cannabutter is a rewarding skill that gives you full control over your edible experience. It transforms your Bulk Flower purchase into weeks’ worth of delicious, potent treats. Whether you use the classic stovetop simmer or the modern slow-cooker approach, the result is a versatile ingredient that opens up a world of culinary creativity.
Remember the golden rules: Decarb first, keep the heat low, and label your edibles clearly (so your roommate doesn’t accidentally eat a space-cookie for breakfast).
Ready to get cooking? Pick up some premium Indica or Sativa flower from LeafyMarket today and start your infusion journey.